
With the addition of the forward looking camera, the procedure to test the install of a DT4000REV7 on a truck has changed because it now includes a check to make sure the camera is pointing in the right direction. We’ve outlined for the truck test below:
- DT4000REV7 – Installation Verification Procedure
1) After installation, log on to the DT4000REV7 and run a health check - This will verify the unit is in working condition.
- Health Check "Run Test" button can be accessed from SYSINFO | Diagnostics | Health Check tab
- Follow instructions for the procedure
2) Run a JBUS Audit - This will verify that the JBUS data portion of the DriverTech system is working properly
- "Audit JBus" button can be accessed from SYSINFO | Diagnostics | JBus tab
- This will send a message to FleetWatcher with all information received on the JBUS (J1939 and J1708)
- The FleetWatcher website will have the information on the Message tab for this vehicle.
3) Calibrate the camera to verify the view and angle for recording video:
- Click on the camera icon to invoke the camera application located in the taskbar at the bottom of the page- You will need to close the Keyboard in order to see camera icon.
Take a photograph and determine if camera adjustment is necessary.
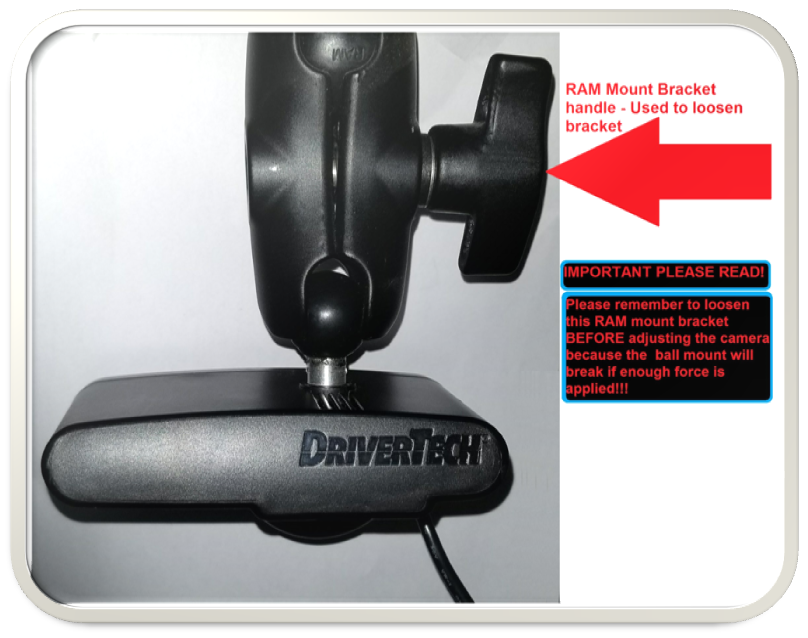
VERY IMPORTANT WARNING!
LOOSEN the RAM mount that is holding the camera in place - The camera bracket ball will break if you do not completely loosen the RAM Mount bracket.
Make adjustment to camera
Slightly tighten RAM mount bracket
Take a photograph and determine if camera adjustment is necessary
LOOSEN the RAM mount that is holding the camera in place and repeats steps i. through iv.
Related articles