How-to article template
Step-by-step guide
As soon as each units reboots that will start using the new settings and start searching for this Wifi Access Point. This will happen automatically and will not require any interaction from any of your driversBelow are the steps used to add the Wifi Settings. You can use these same steps to add up to 10 different Secured Networks.
- Log in FleetWatcher - http://fw.drivertech.com/

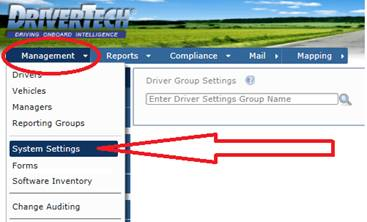
- Click Management
- Click System Settings

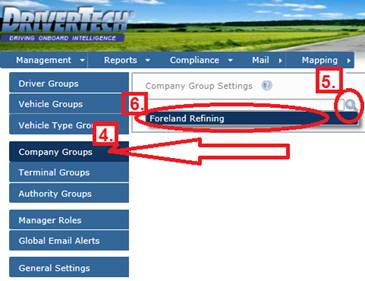
- 4. Click “Company Groups”
- 5. Click “Magnifying Glass”
- Click “(Your Company Name)”

- Click “Edit”
-

- Scroll down
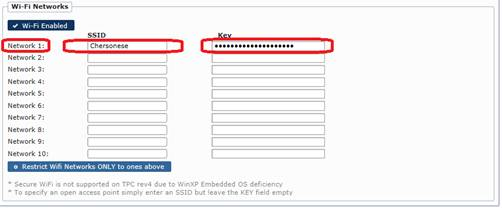
- For your First named “Network 1:” Copy and Paste your SSID under the “SSID” column
- For your First named “Network 1:” Copy and Paste your Password under the “Key” column
-

- For your Second named “Network 2:” Copy and Paste your SSID under the SSID column
- For your Second named “Network 2:” Copy and Paste your Password under the “Key” column
- You may enter 1 or up to 10 different Networks setup.
- Scroll up
- Click Save

| How to setup WiFi for the company or terminal for TruckPC units to connect to |
Related articles
Related articles appear here based on the labels you select. Click to edit the macro and add or change labels.

How-to Add Wifi for trucks


