...
Here are 3 Main ways the driver is able to Add a DVIR (Driver Vehicle Inspection Report) on his unit:
- When a driver selects “Off-Duty or Sleeper Berth > End of Shift” It will bring up a notification asking if the driver would like to enter a DVIR
- When a driver selects “On-Duty > Inspection > Post-Trip” It will bring up a notification asking if the driver would like to enter a DVIR
- The driver is able to Add a DVIR at any time by opening
...
- HOS
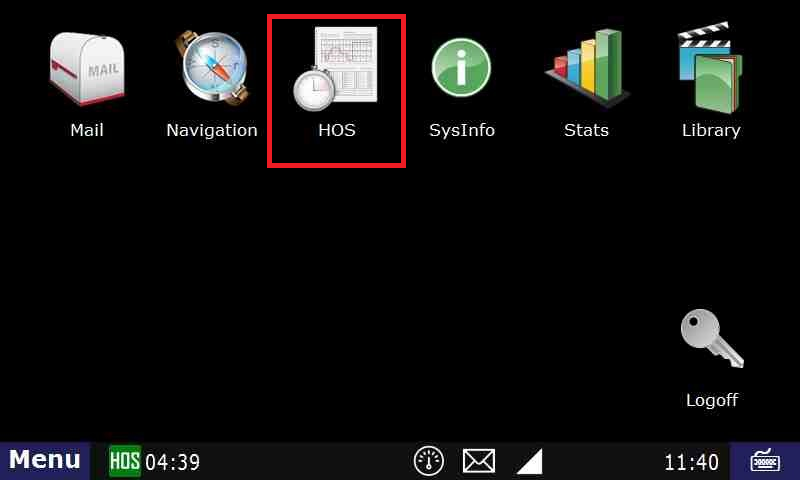
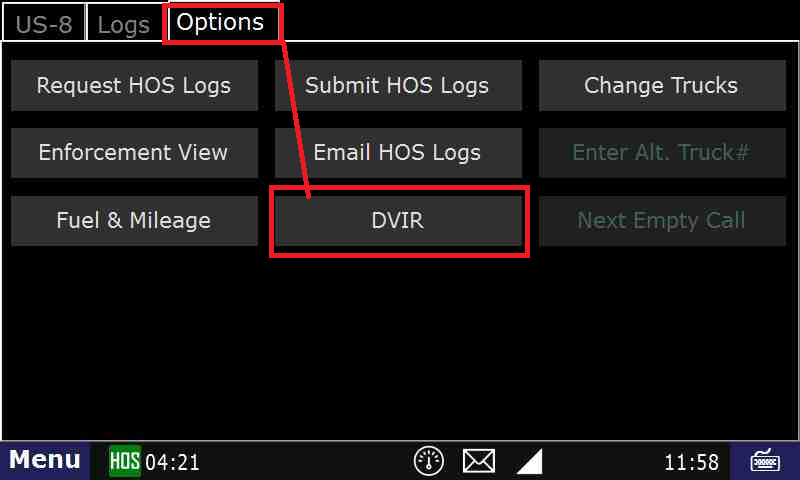
- Then select “Options > DVIR
...
- >
- Add DVIR.”
...

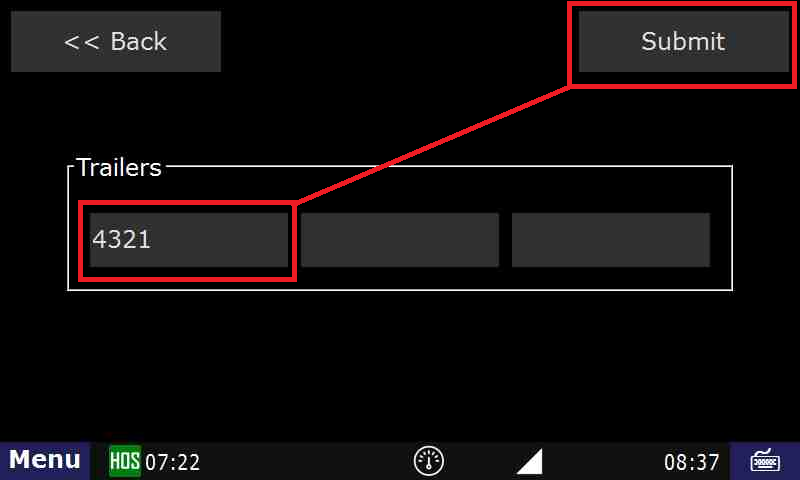
- Enter a trailer number if necessary and press “Submit”

- Go to the Options tab and select DVIR

- Touch Add DVIR

- Enter a trailer number if necessary, then Submit
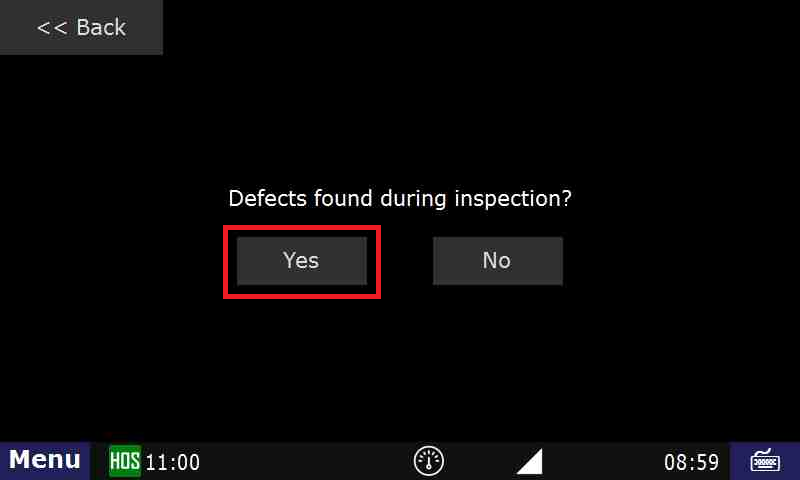
When you start a DVIR, it will ask if any defects were found during the inspection. If so, press “Yes”
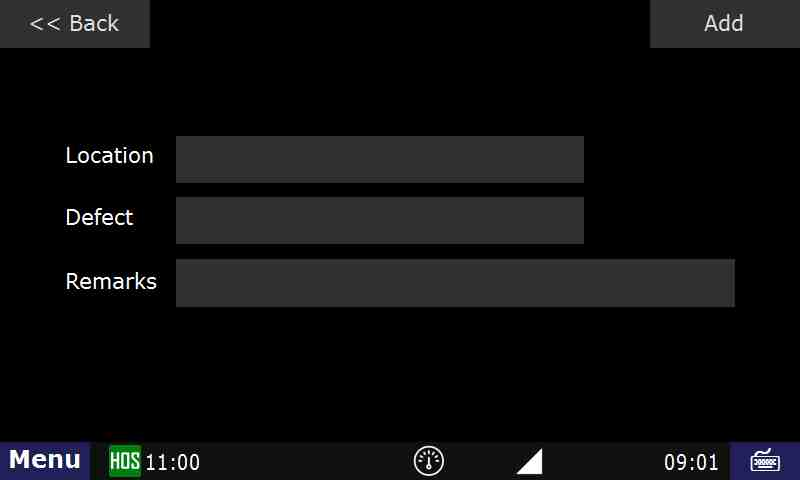
This step will ask you where the defect is located, and a description of the defect itself. You can also add additional remarks about the defect
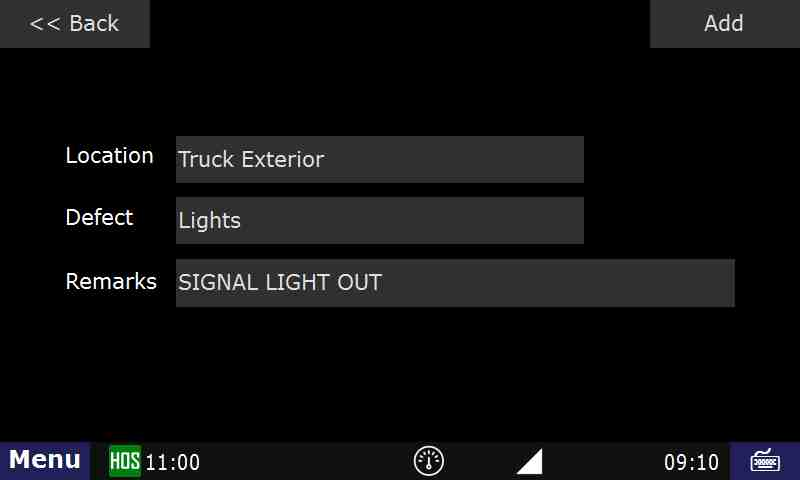
After choosing “Location”, select where the defect is located. Here we will be selecting “Truck Exterior”. Click on Add
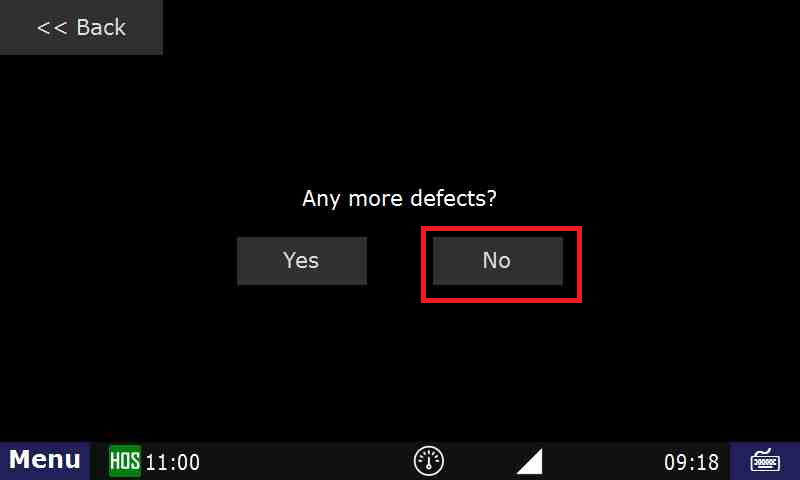
Once the defect is added and there are no more defects to submit, touch No.
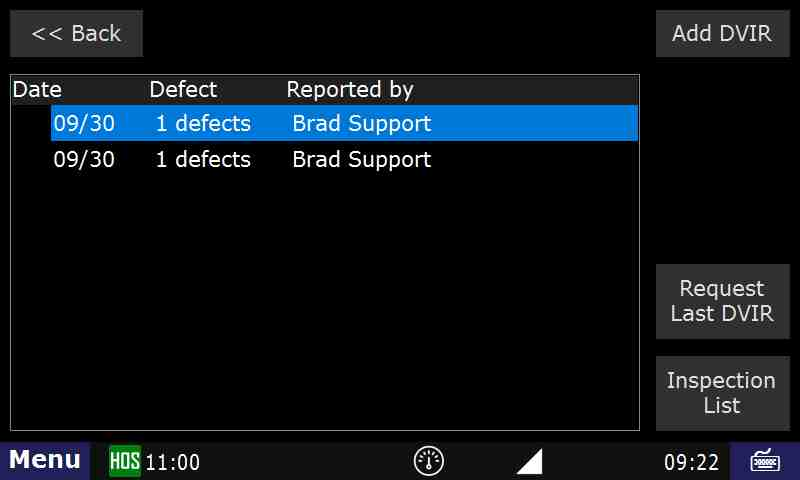
After you press “Submit”, you will then be able to view the status and DVIR in the “List” tab for the current day’s log
...